BYBIT · KYC
Bybit KYC Verification Guide
Complete identity verification with clear documents and the correct live-account options.
Referral code MTOWN20% trading fee discountOfficial-source workflow
STEP BY STEP
What to do in order
Button names and layout can change as the exchange updates its app and website. The live account screen is the final reference.
Reviewed Aug 31, 2026Official-source links checkedLive account screen is final
STEP 01
Open Identity Verification
From the account area, open Identity Verification and select Verify Now.
STEP 02
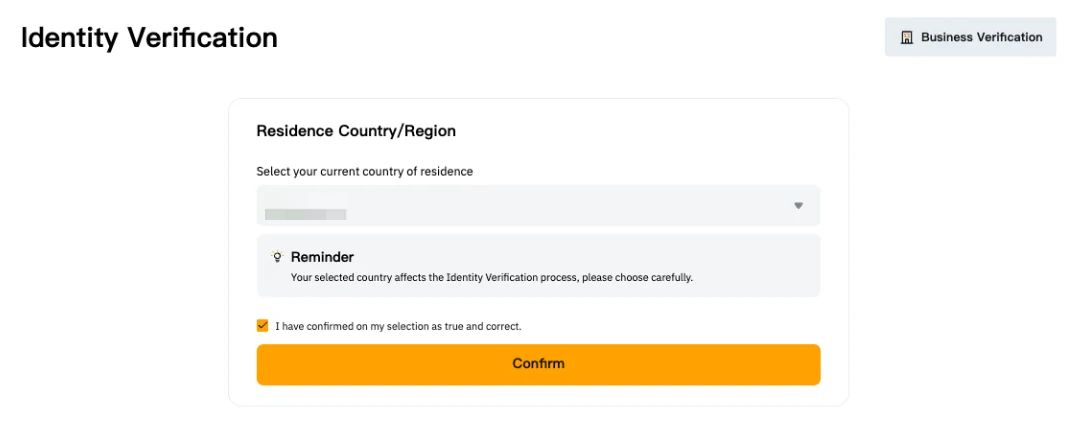
Confirm residence
Choose the accurate current country or region of residence.
STEP 03
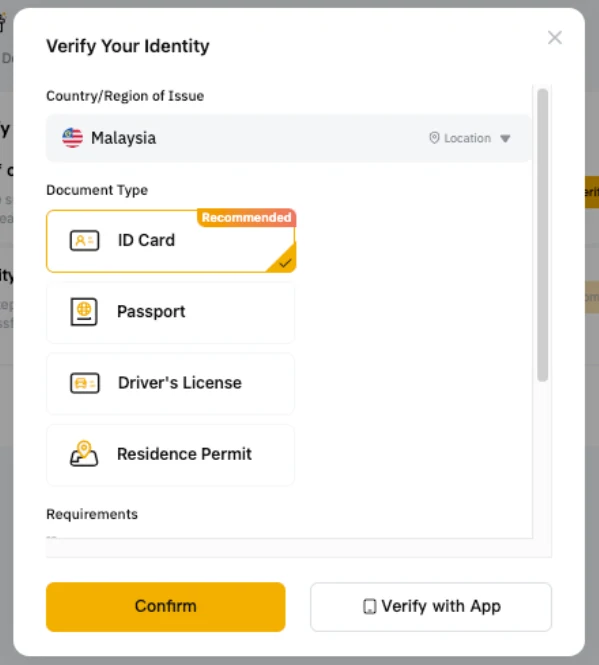
Choose the issuing country and ID type
Use an accepted identity document shown in your live account.
STEP 04
Capture the document clearly
Keep all corners visible and avoid blur, glare or edits.
STEP 05
Complete facial recognition
Use the device camera or the QR flow if offered.
STEP 06
Check the verification status
If extra assessment or address proof is requested, follow the live account instructions.
Official reference
We use the exchange's own help content as the baseline and rewrite the workflow for faster scanning.
Open Bybit official documentation →Bybit screen walkthrough